![]()
How to set up
SLA monitoring with CorpIT’s
PRTG Plugin in 5 steps
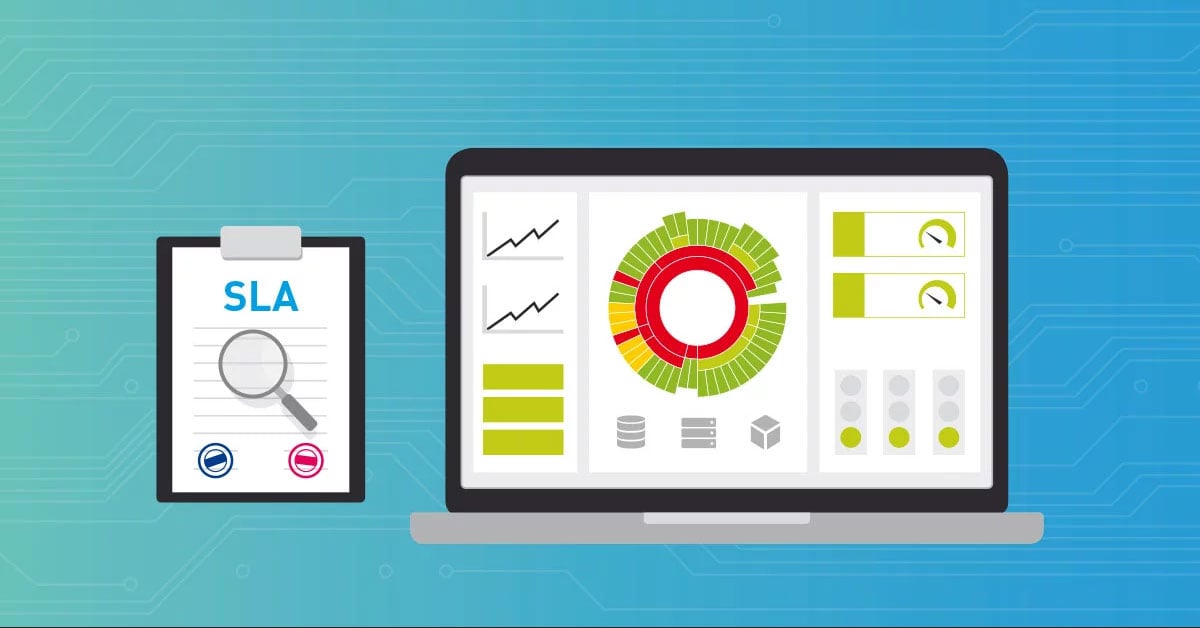
It's all about numbers
Especially MSPs often need to provide numbers to support their SLAs. While PRTG offers limited native capabilities to do so, our partner CORP-IT from Switzerland created a plugin for this. Here’s a step-by-step guide to get you started.
- You can download the plugin from the Corp-IT website.
- Good news, similarly to PRTG they have a 30-day trial to make testing for you as convenient as possible for you.
- If you want to know how many days you have left, you can find this in the About section of your profile.
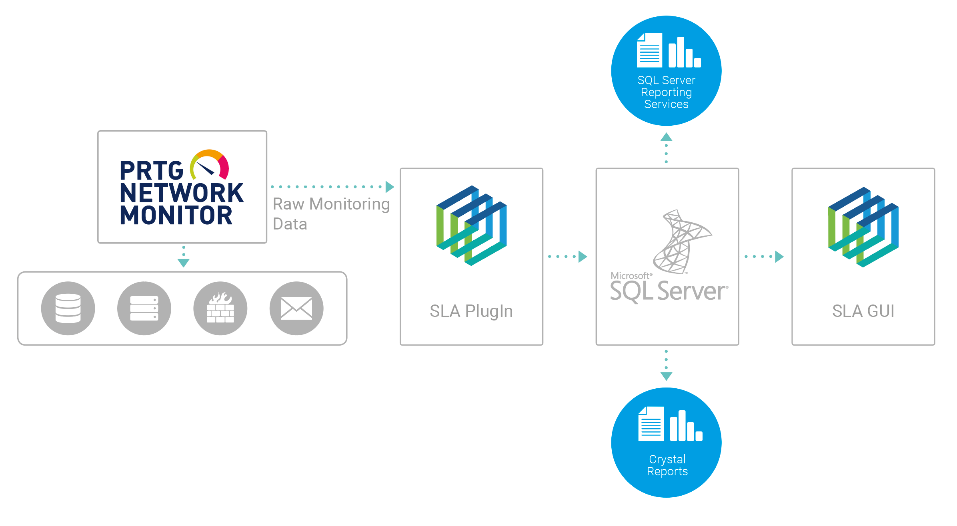
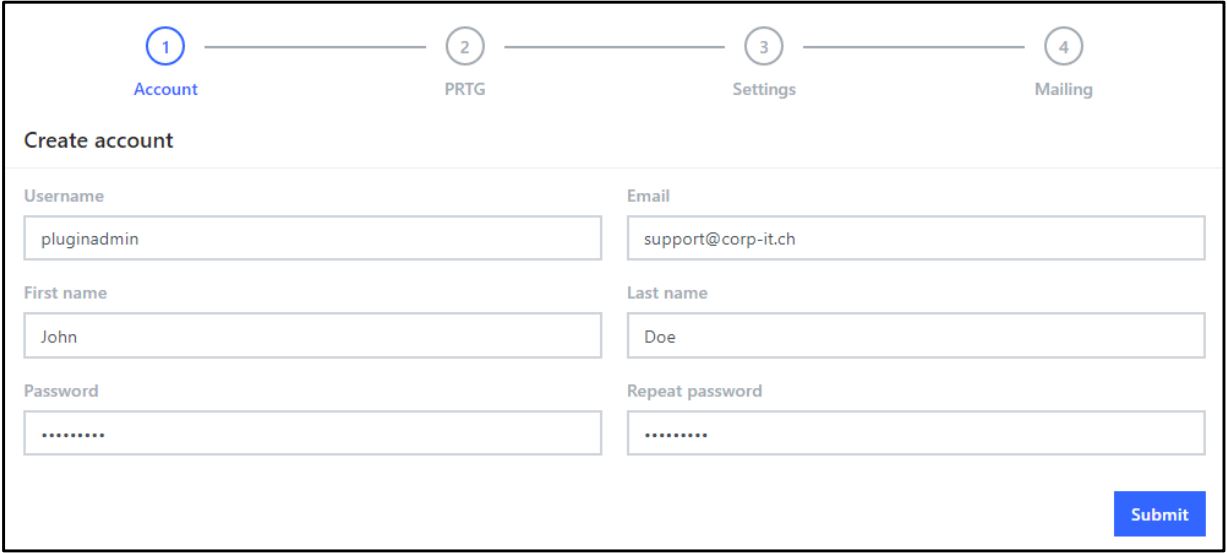
Once the installation is done, you will be guided through the initial setup with a wizard. You will have to define your user and in a second step you will be asked to enter your PRTG credentials which include the following points:
- Web server’s IP address
- Port for connection
- Login name
- Password
The next few steps include setting up the mail settings and general settings, such as entering paths where you want to store reports and logs.
![]()
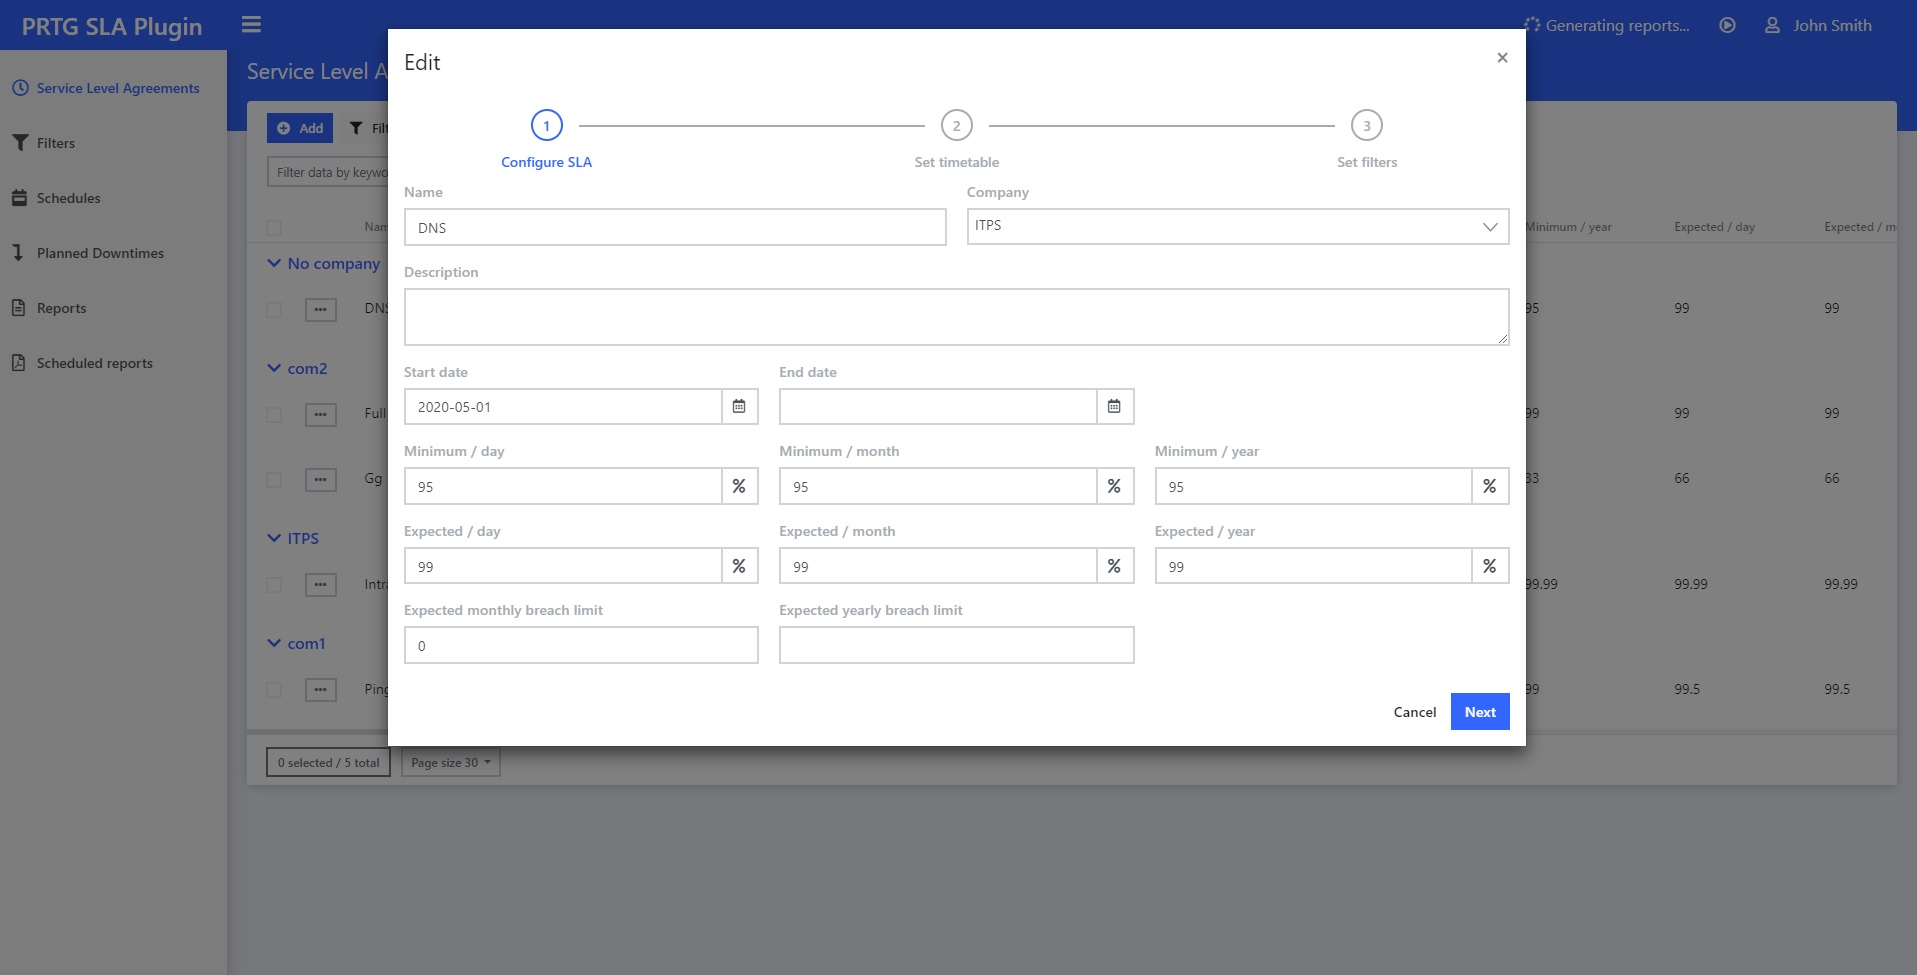
This is where it gets interesting – creating your first SLA within the plugin.
- Give the SLA a meaningful name,
- fill in the start date,
- the minimum required percentage per day/month/year, as well as
- the expected availability in uptime per day/month/year and the
- expected monthly/yearly breach limit.
This breach limit is especially useful if you are dealing with short but frequent downtimes, as the SLA will be marked as breached even if the minimum availability required was fulfilled.
![]()
You can adapt the reports using your company logo
and set some global parameters.
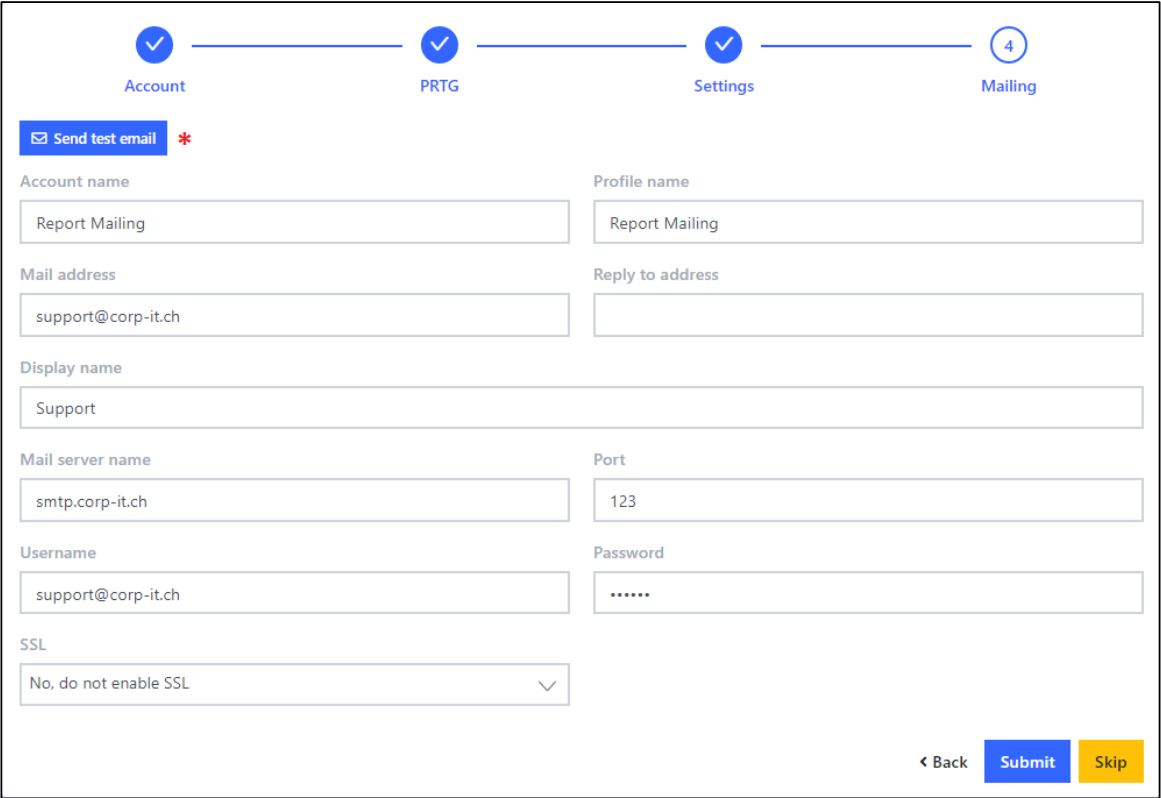
![]()
To mail reports automatically,
you need to setup the mailing.
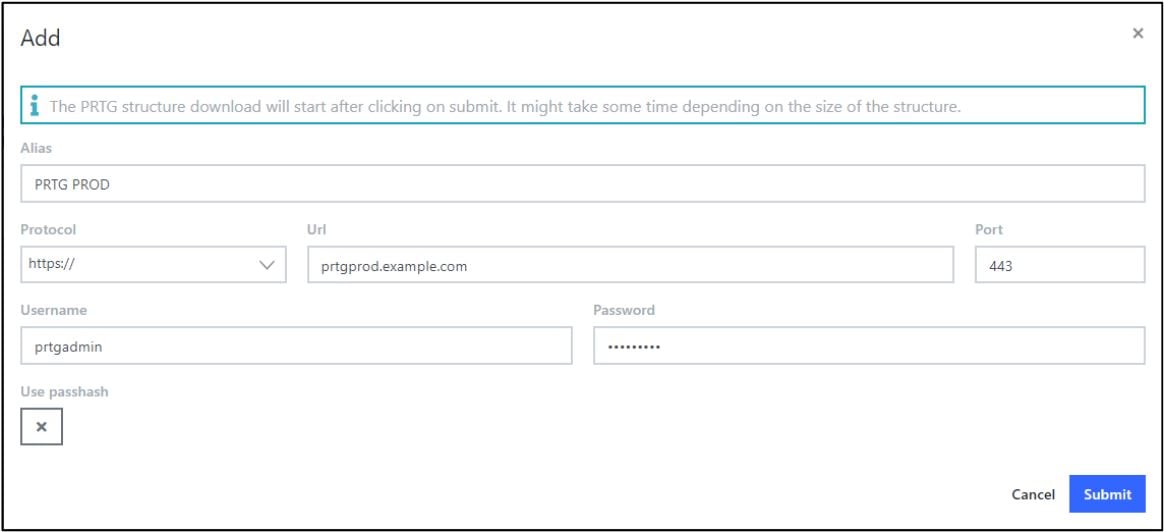
After finishing all the previous steps, you will now initiate the “upload” of our PRTG
structure to the database of the plugin. Depending on the size of the PRTG structure
(number of groups, devices, sensors), this can take up to several minutes.
- First, you need to configure the connection to your PRTG server.
- After clicking on Submit, your PRTG structure is uploaded.
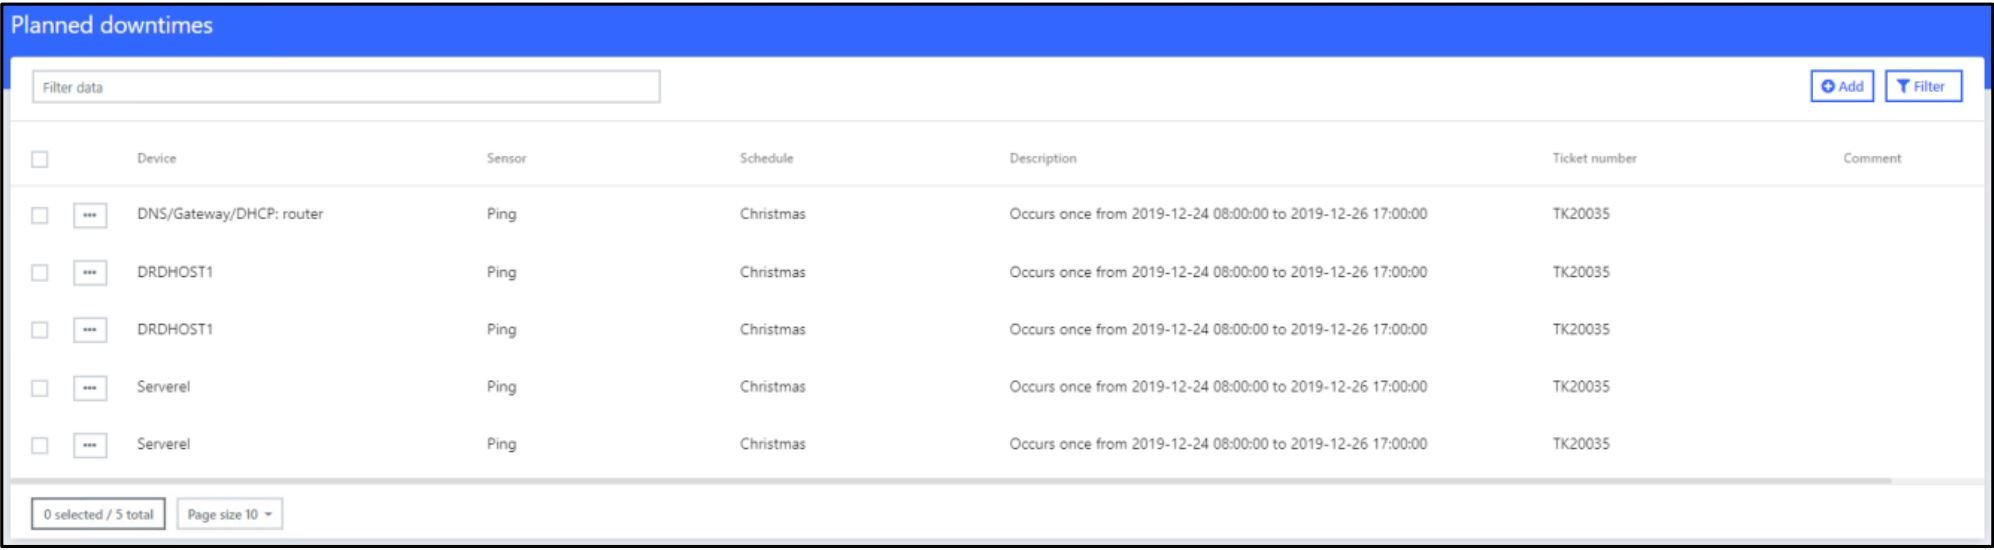
To keep your SLA numbers as “clean” as possible, don’t forget to schedule expected downtimes, either on the schedule page for reoccurring maintenance or a one-time appointment on the planned downtime page.

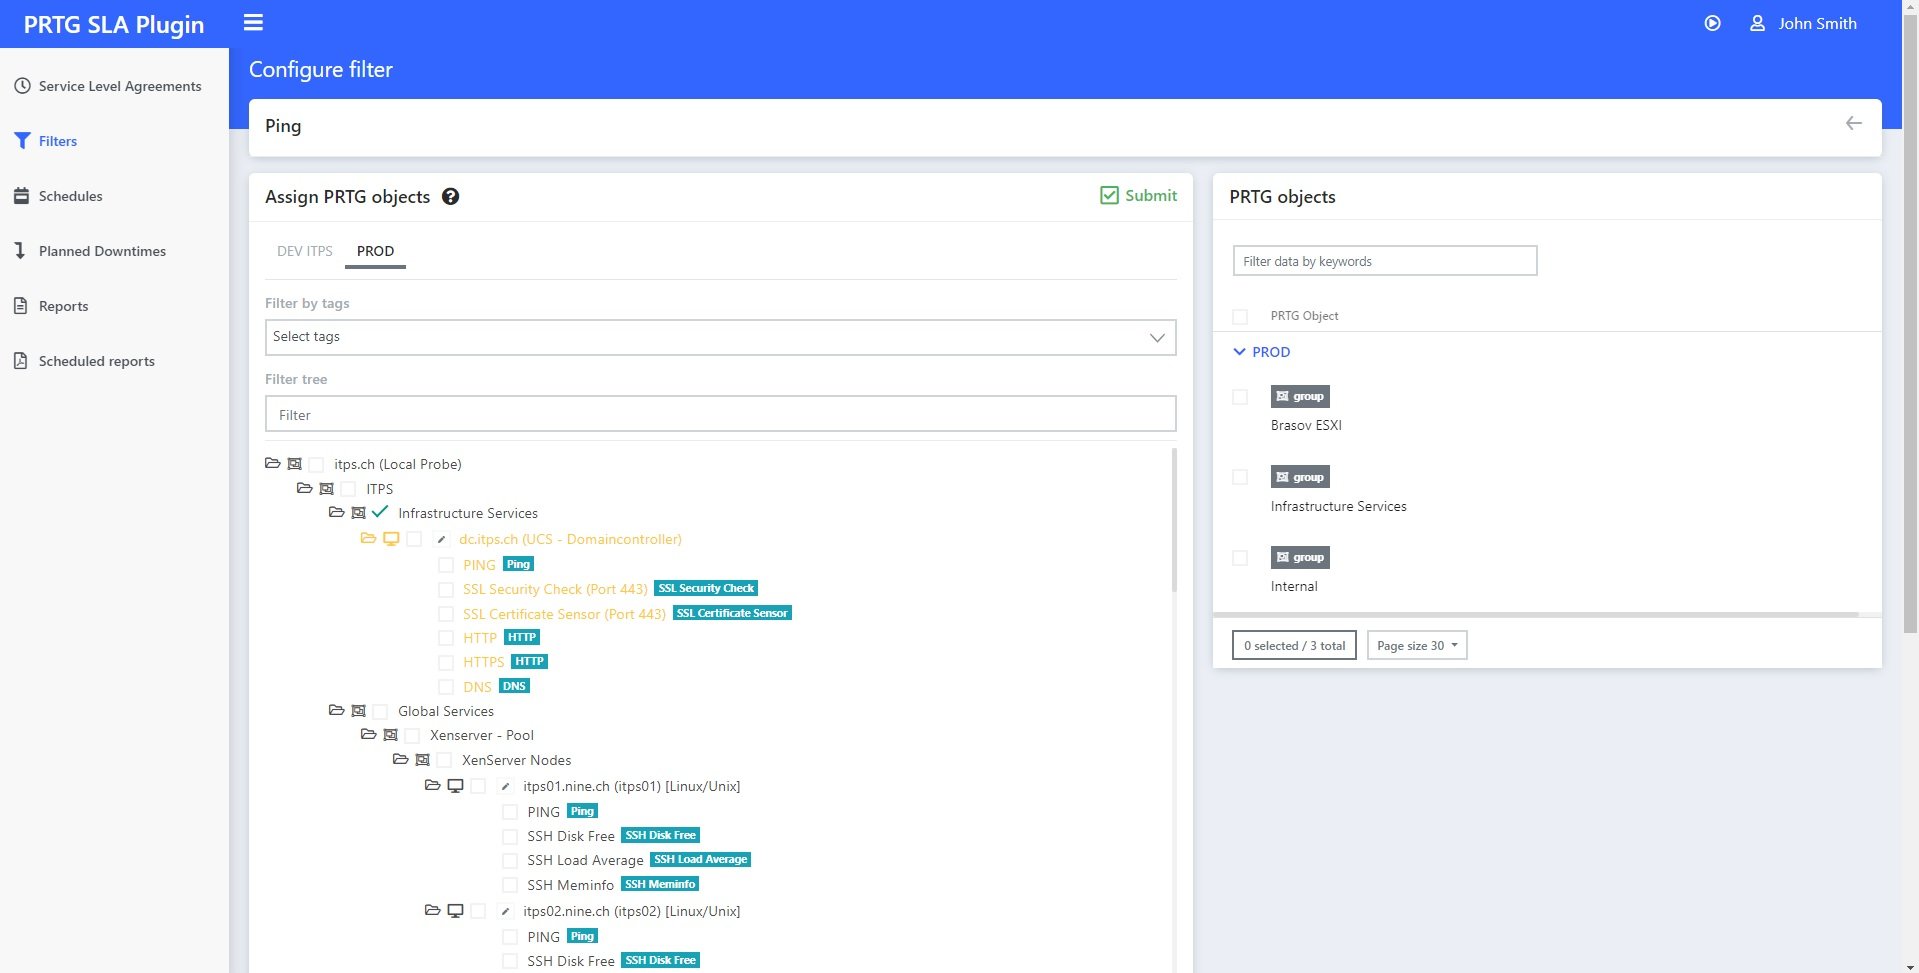
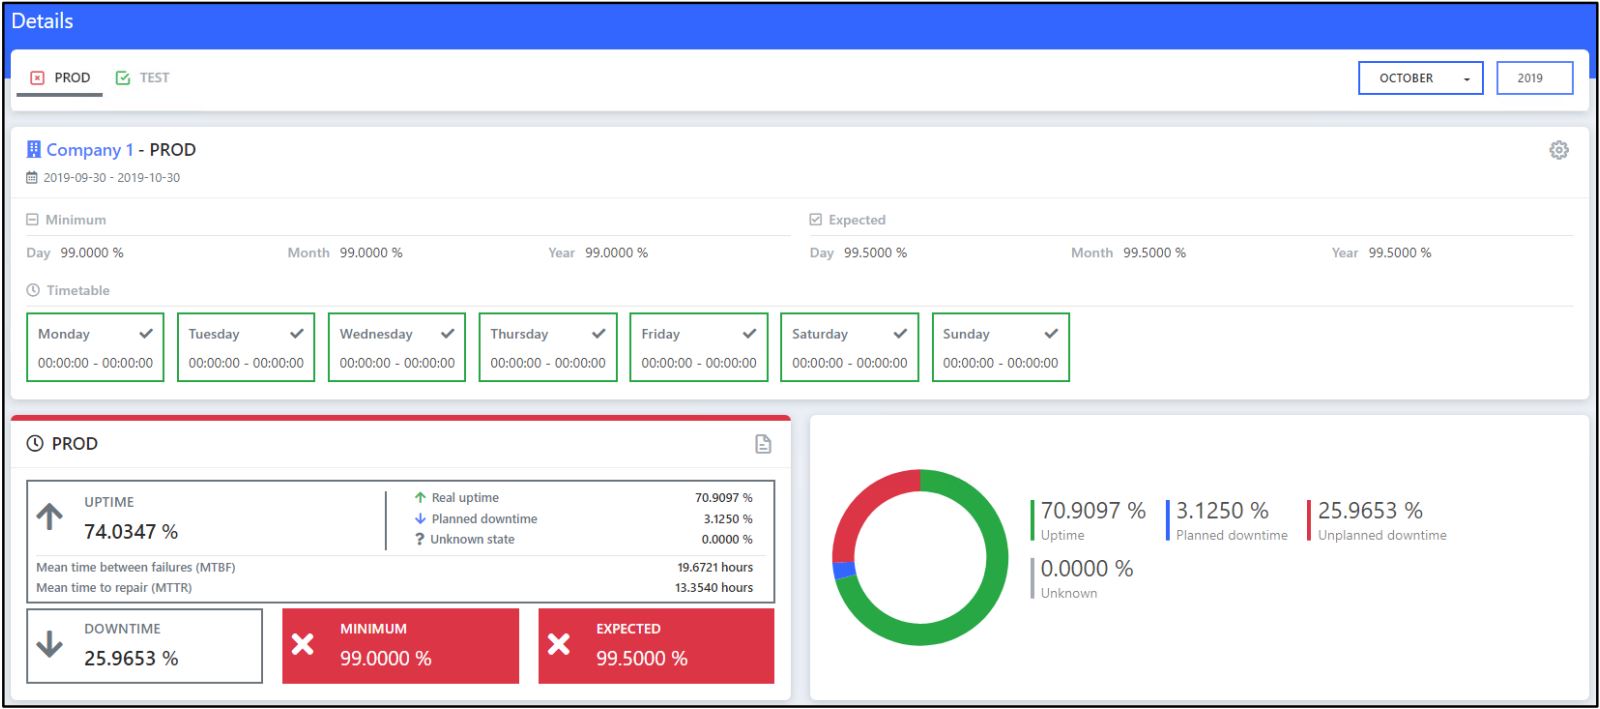
Another thing you should most definitely use is the monitoring of your SLAs. This is done via the page Filters by simply selecting the sensors from the device tree. You are then able to pull SLA reports.
You can find more information in the manual for the plugin or by getting in touch with our Alliance Team or CorpIT and ITPS.
In addition, CorpIT's support team is always available to answer any questions you may have during the trial period.

This how-to guide only scratches the surface?
Get more deep-dive information here!
Get more deep-dive information here!